
Connect your AI agent to Aleta
The Aleta MCP server lets an AI agent read and work with your Aleta data directly. Setup takes about a minute.
You need:
- An Aleta login.
- An agent app that supports remote MCP servers — Claude, ChatGPT, Cursor, VS Code and most others do.
- The server URL:
https://mcp.aleta.io/mcp
The screenshots below are from Claude. Other apps use different wording — look for MCP, Connectors, Tools or Integrations in settings — but the steps are the same.
1. Add the server
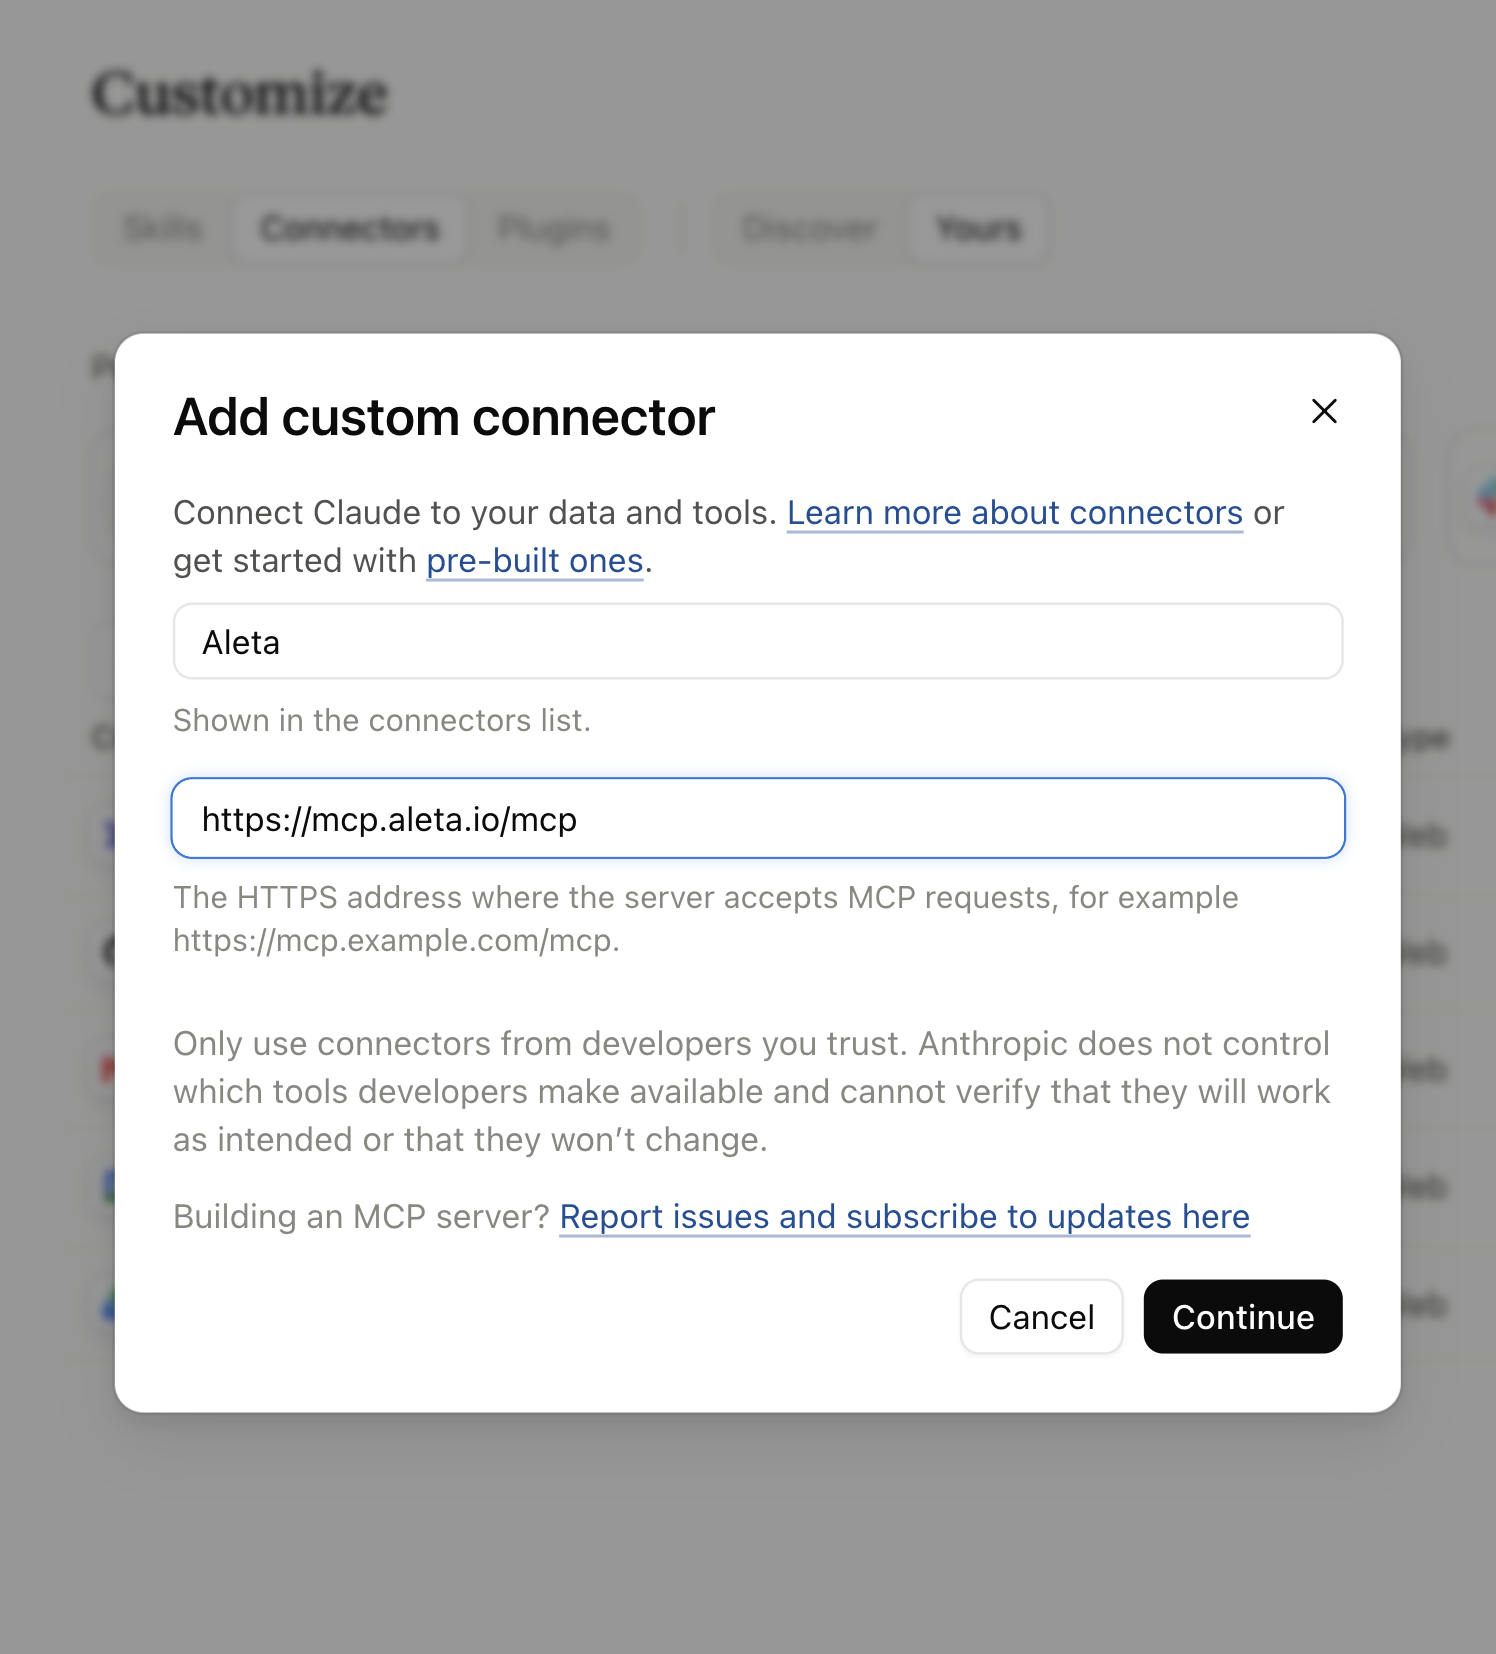
In Claude, as of September 2026, this lives under
Customize → Connectors. Click Add,
then paste https://mcp.aleta.io/mcp as the URL. The name
is up to you — we suggest Aleta. Continue to the next
screen.
2. Accept the detected settings
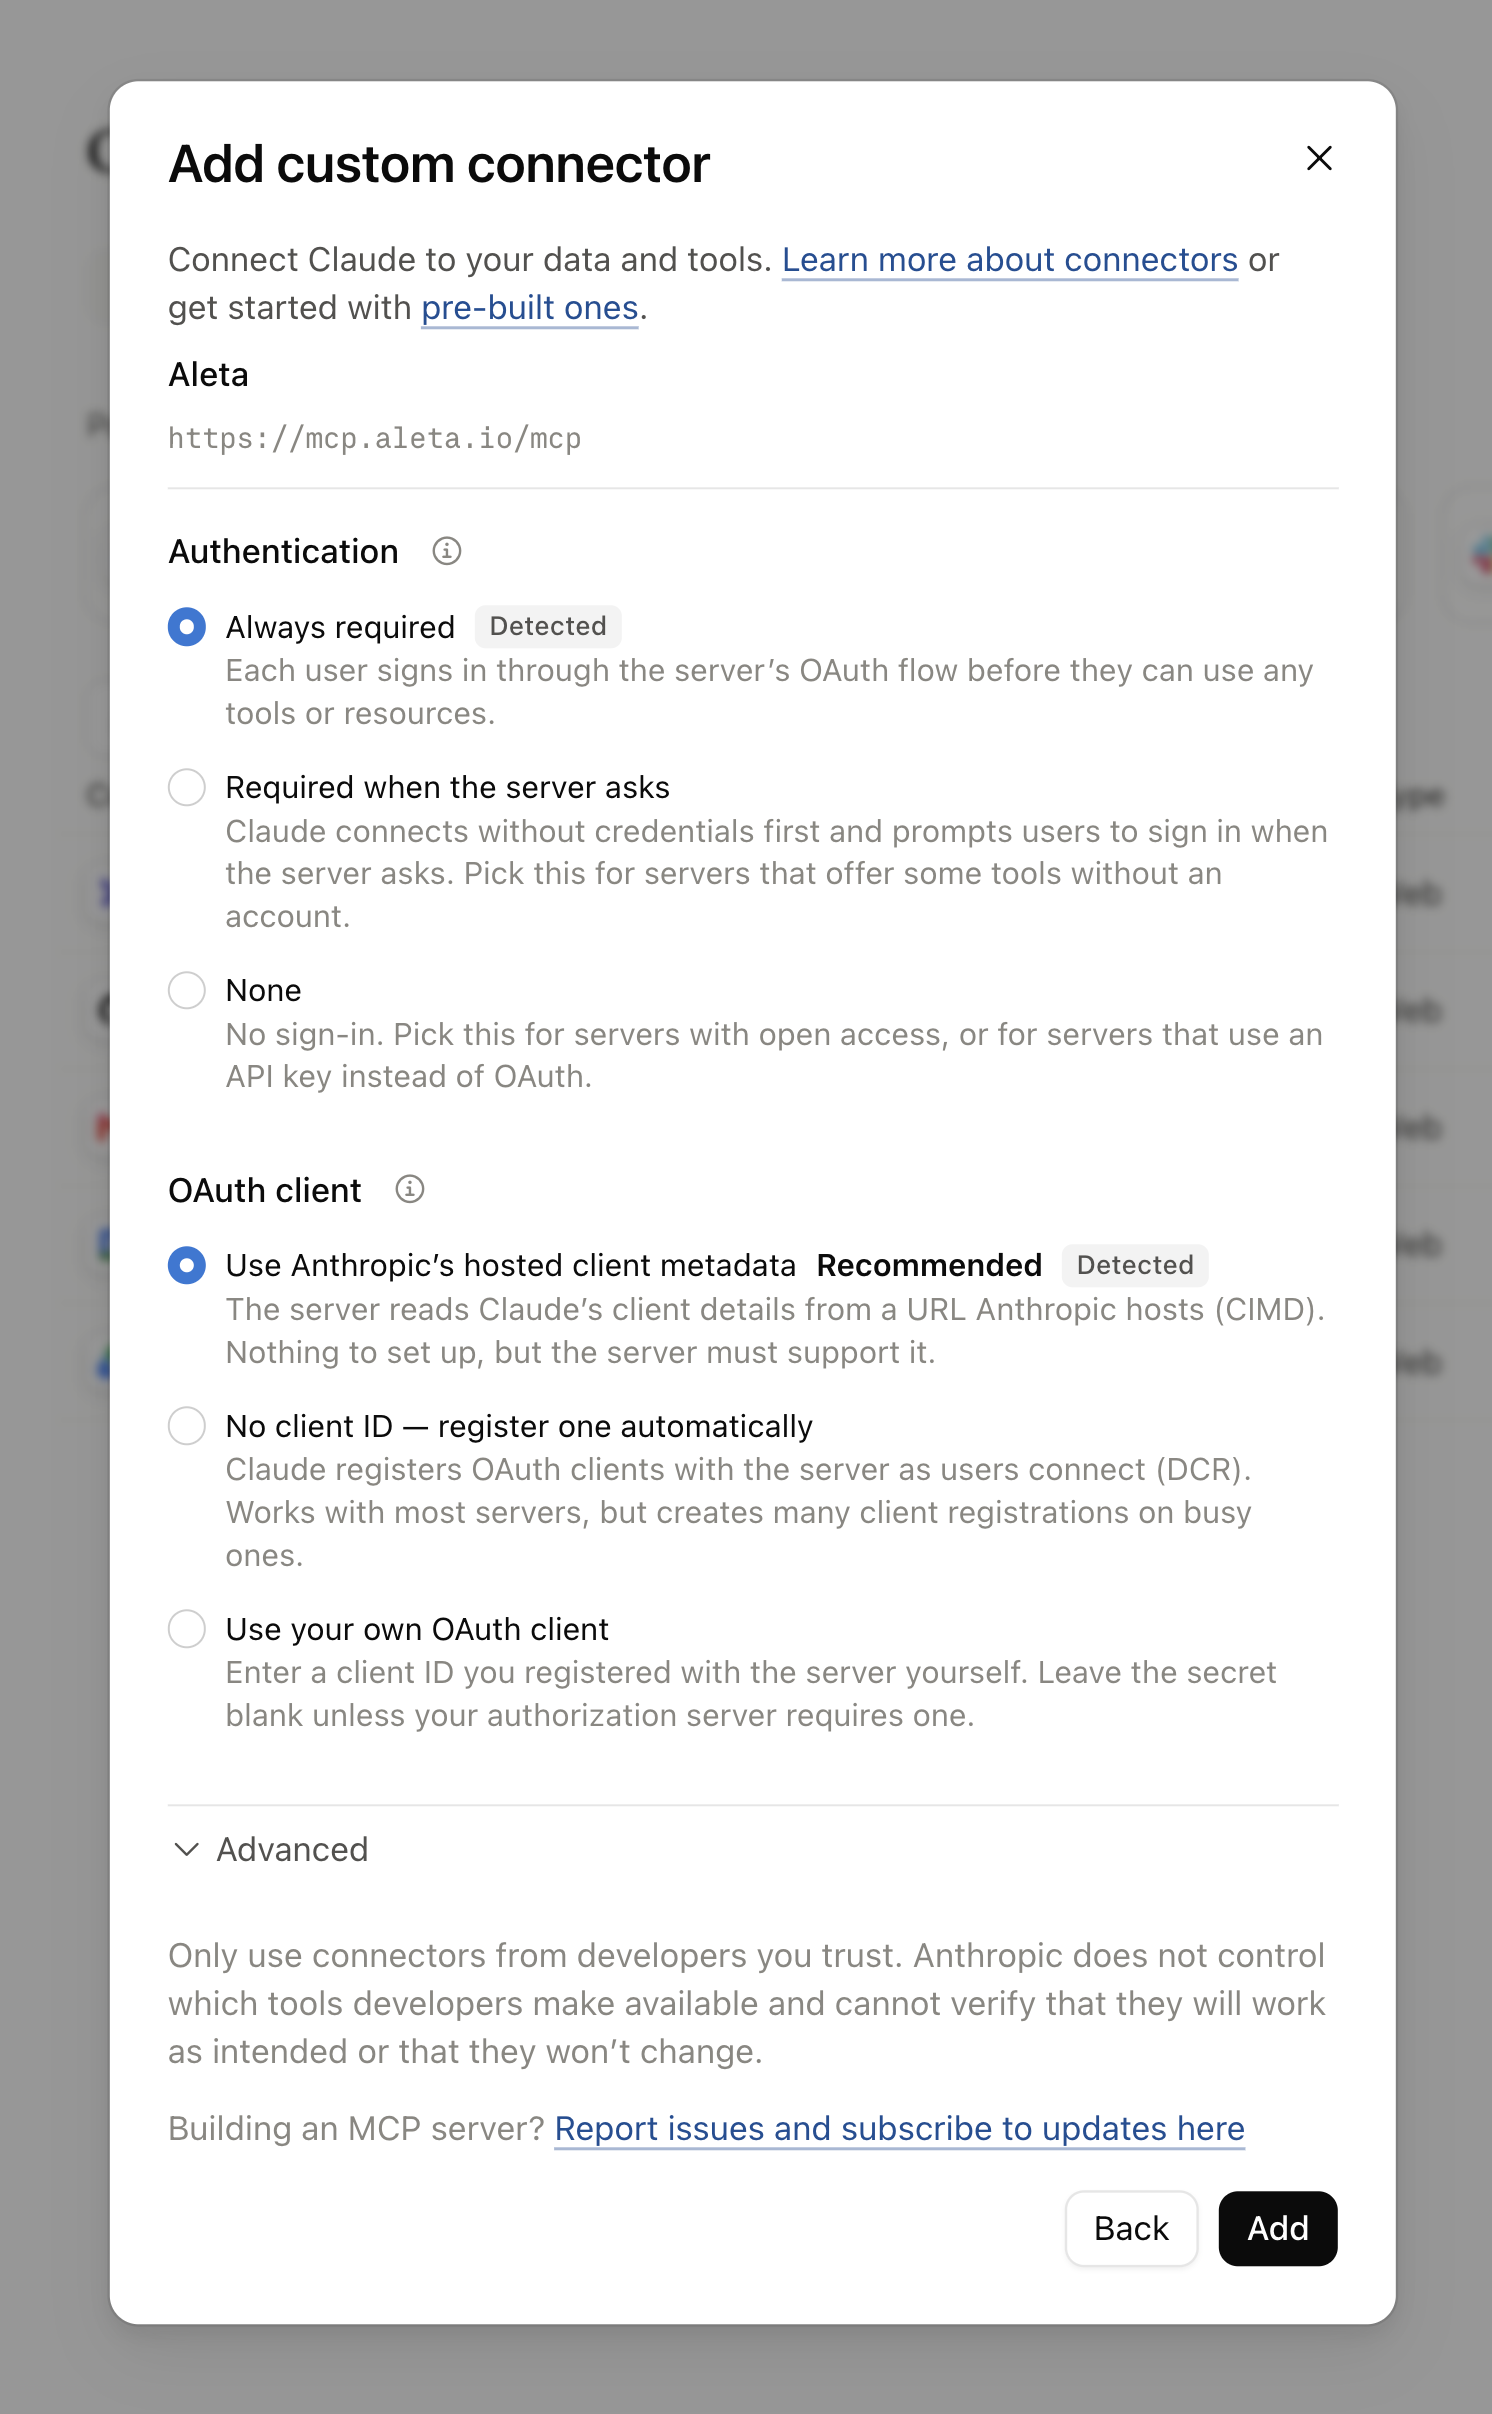
The next screen decides how the agent signs in, and it fills itself in: authentication comes up as Always required and the OAuth client as Anthropic's hosted client metadata, both marked Detected. Leave them alone and add the connector.
3. Sign in
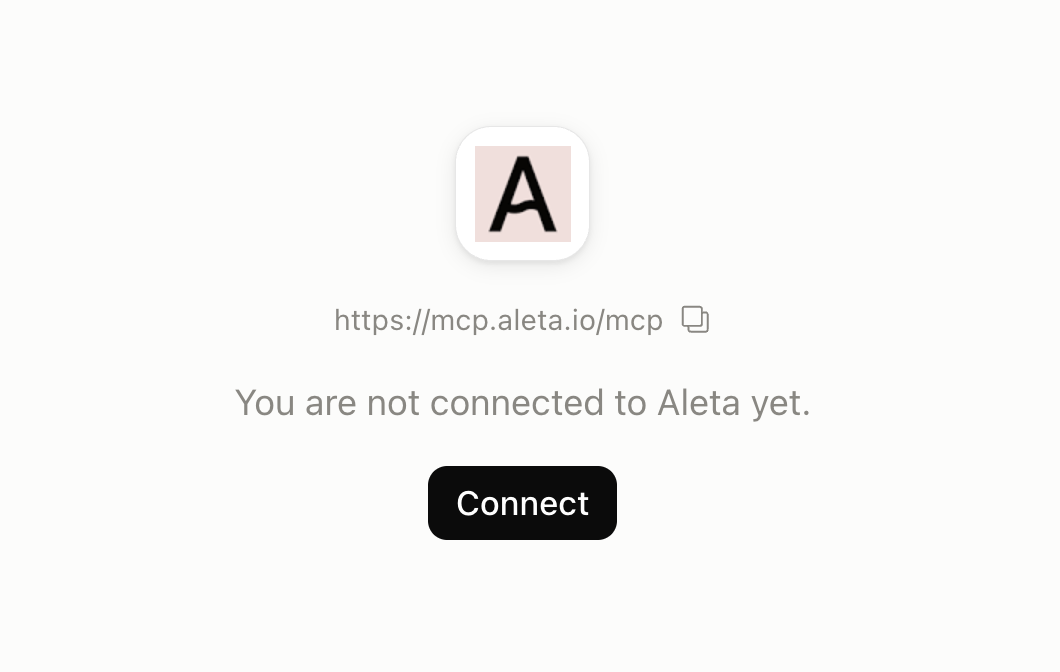
The connector now exists but is not connected yet. Click Connect and sign in with your Aleta login. The agent gets exactly the access your own Aleta user has — nothing more.
4. Check the tool permissions
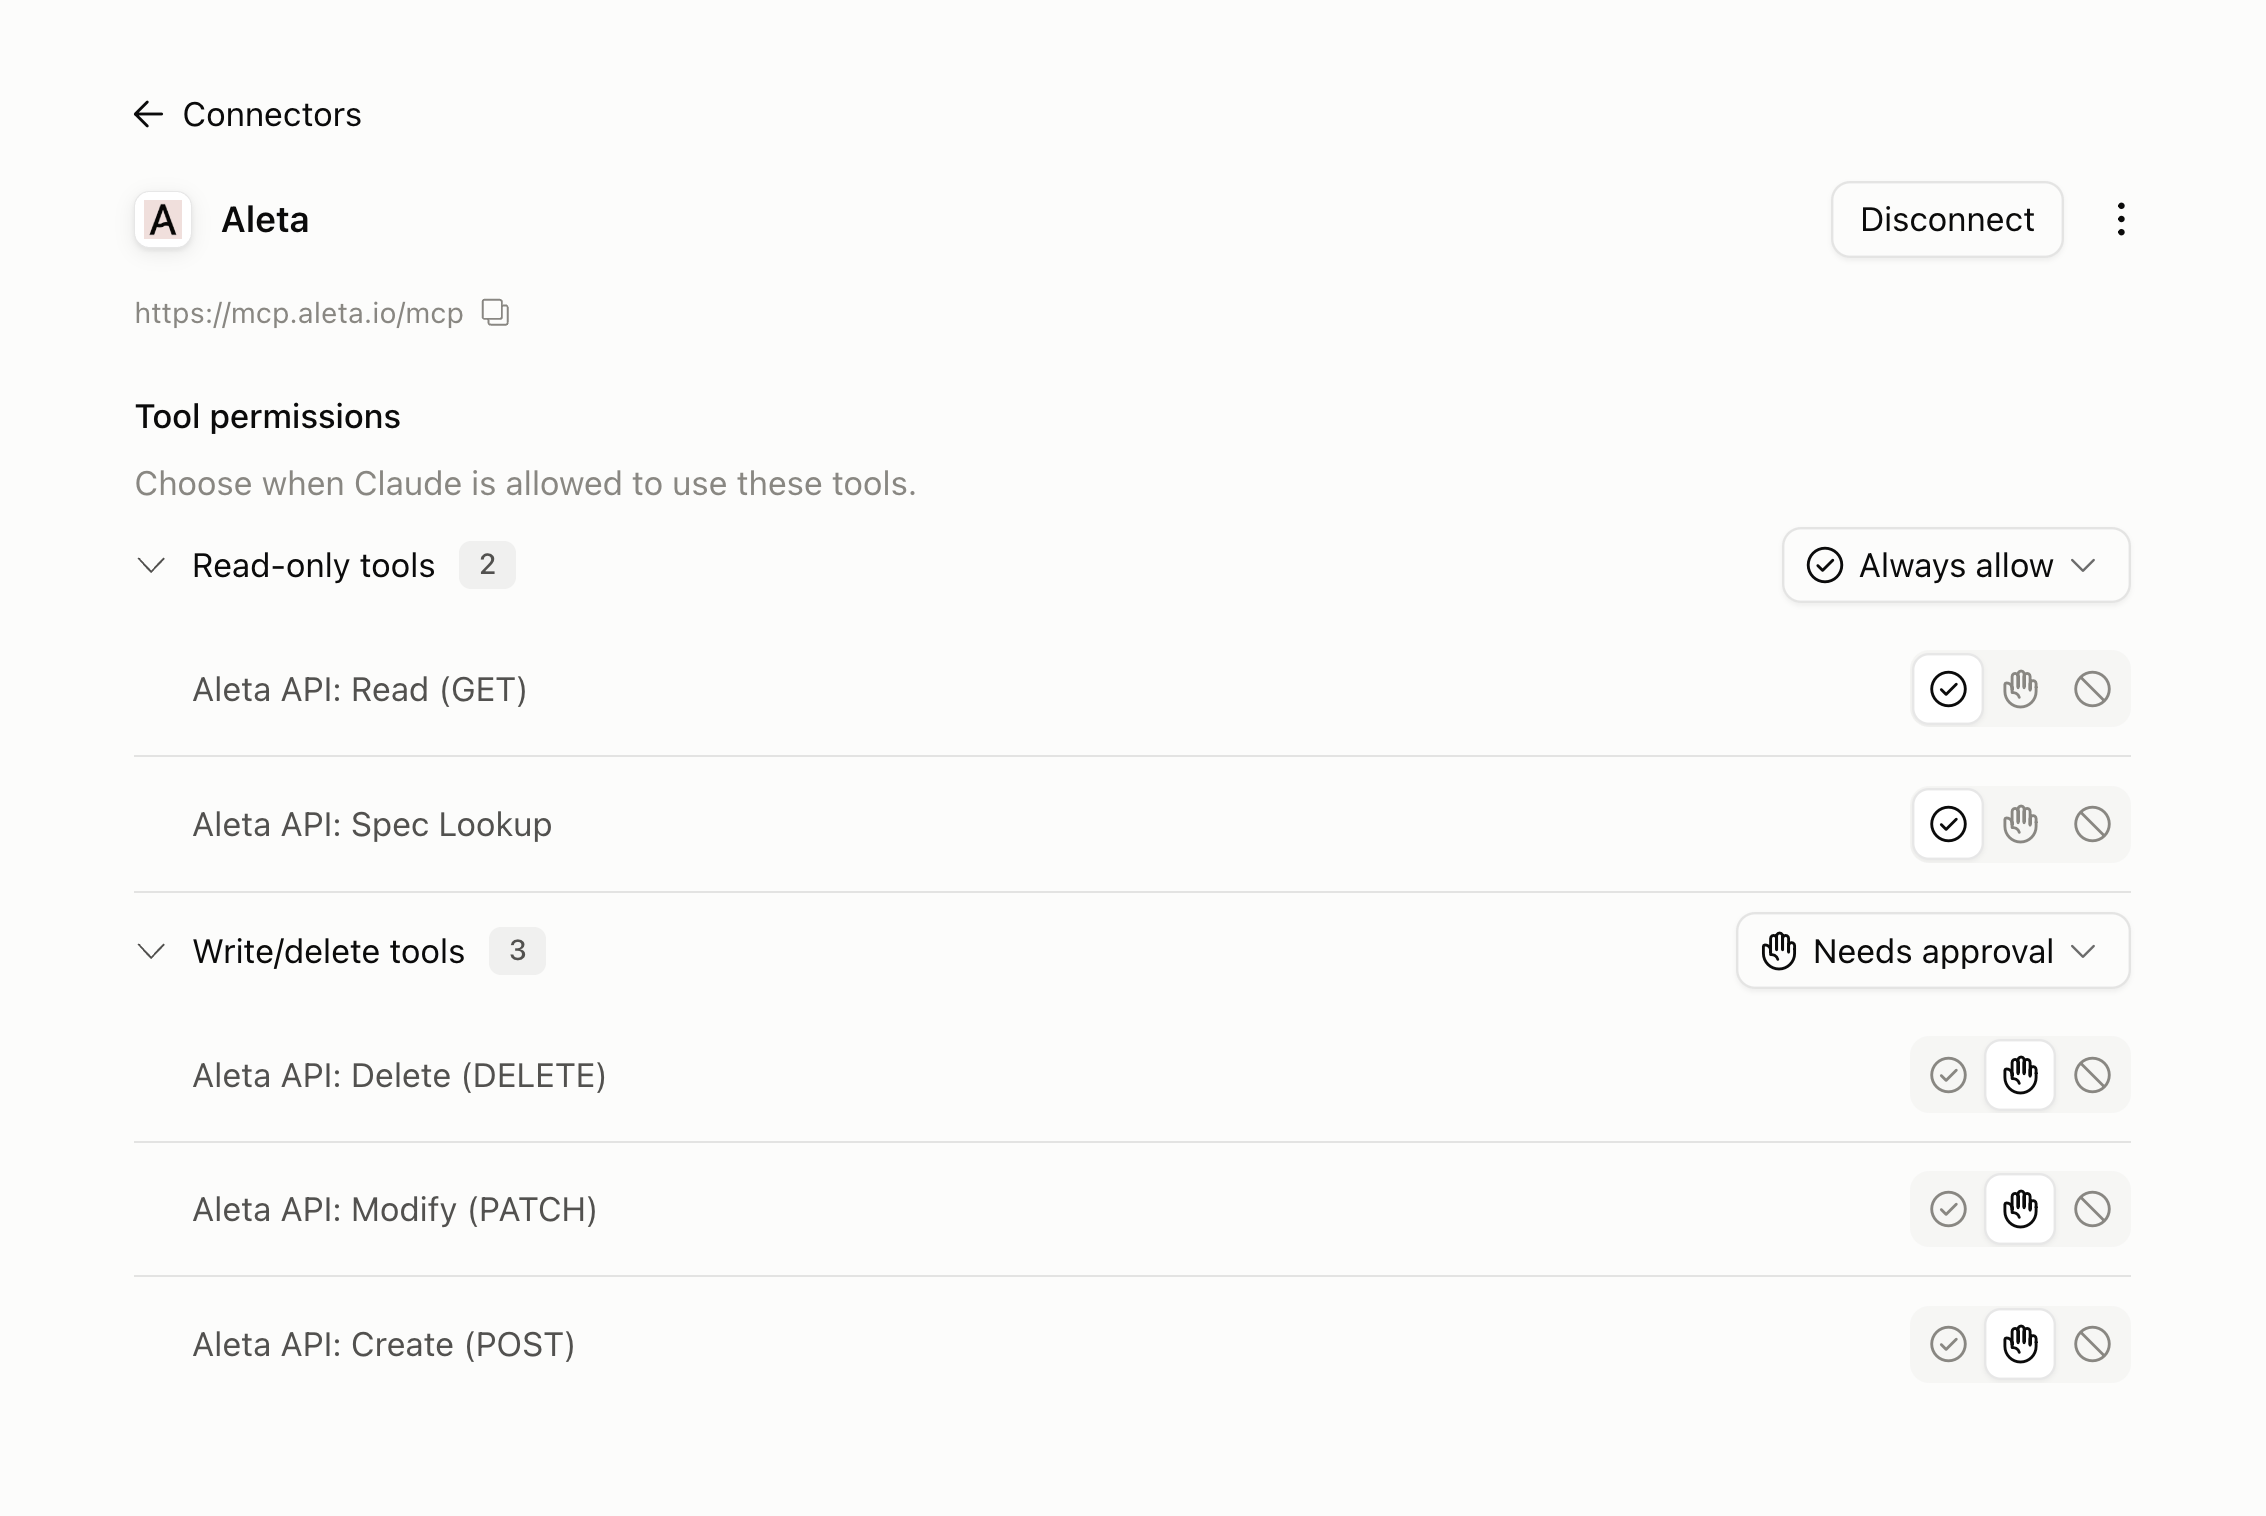
The connector lists its tools in two groups. The read-only tools — reading your data, and looking up the API spec — are set to Always allow. The write/delete tools, which create, change or remove data, are set to Needs approval: the agent has to ask you each time before it uses one.
That's it — the connection works. Ask your agent to use the Aleta MCP and dive into your data.
Read-only setup
If you would rather the agent could never change anything, set the write/delete group to Blocked. The read-only tools stay on, so the agent can still answer questions about your data — it simply has no way to modify it.
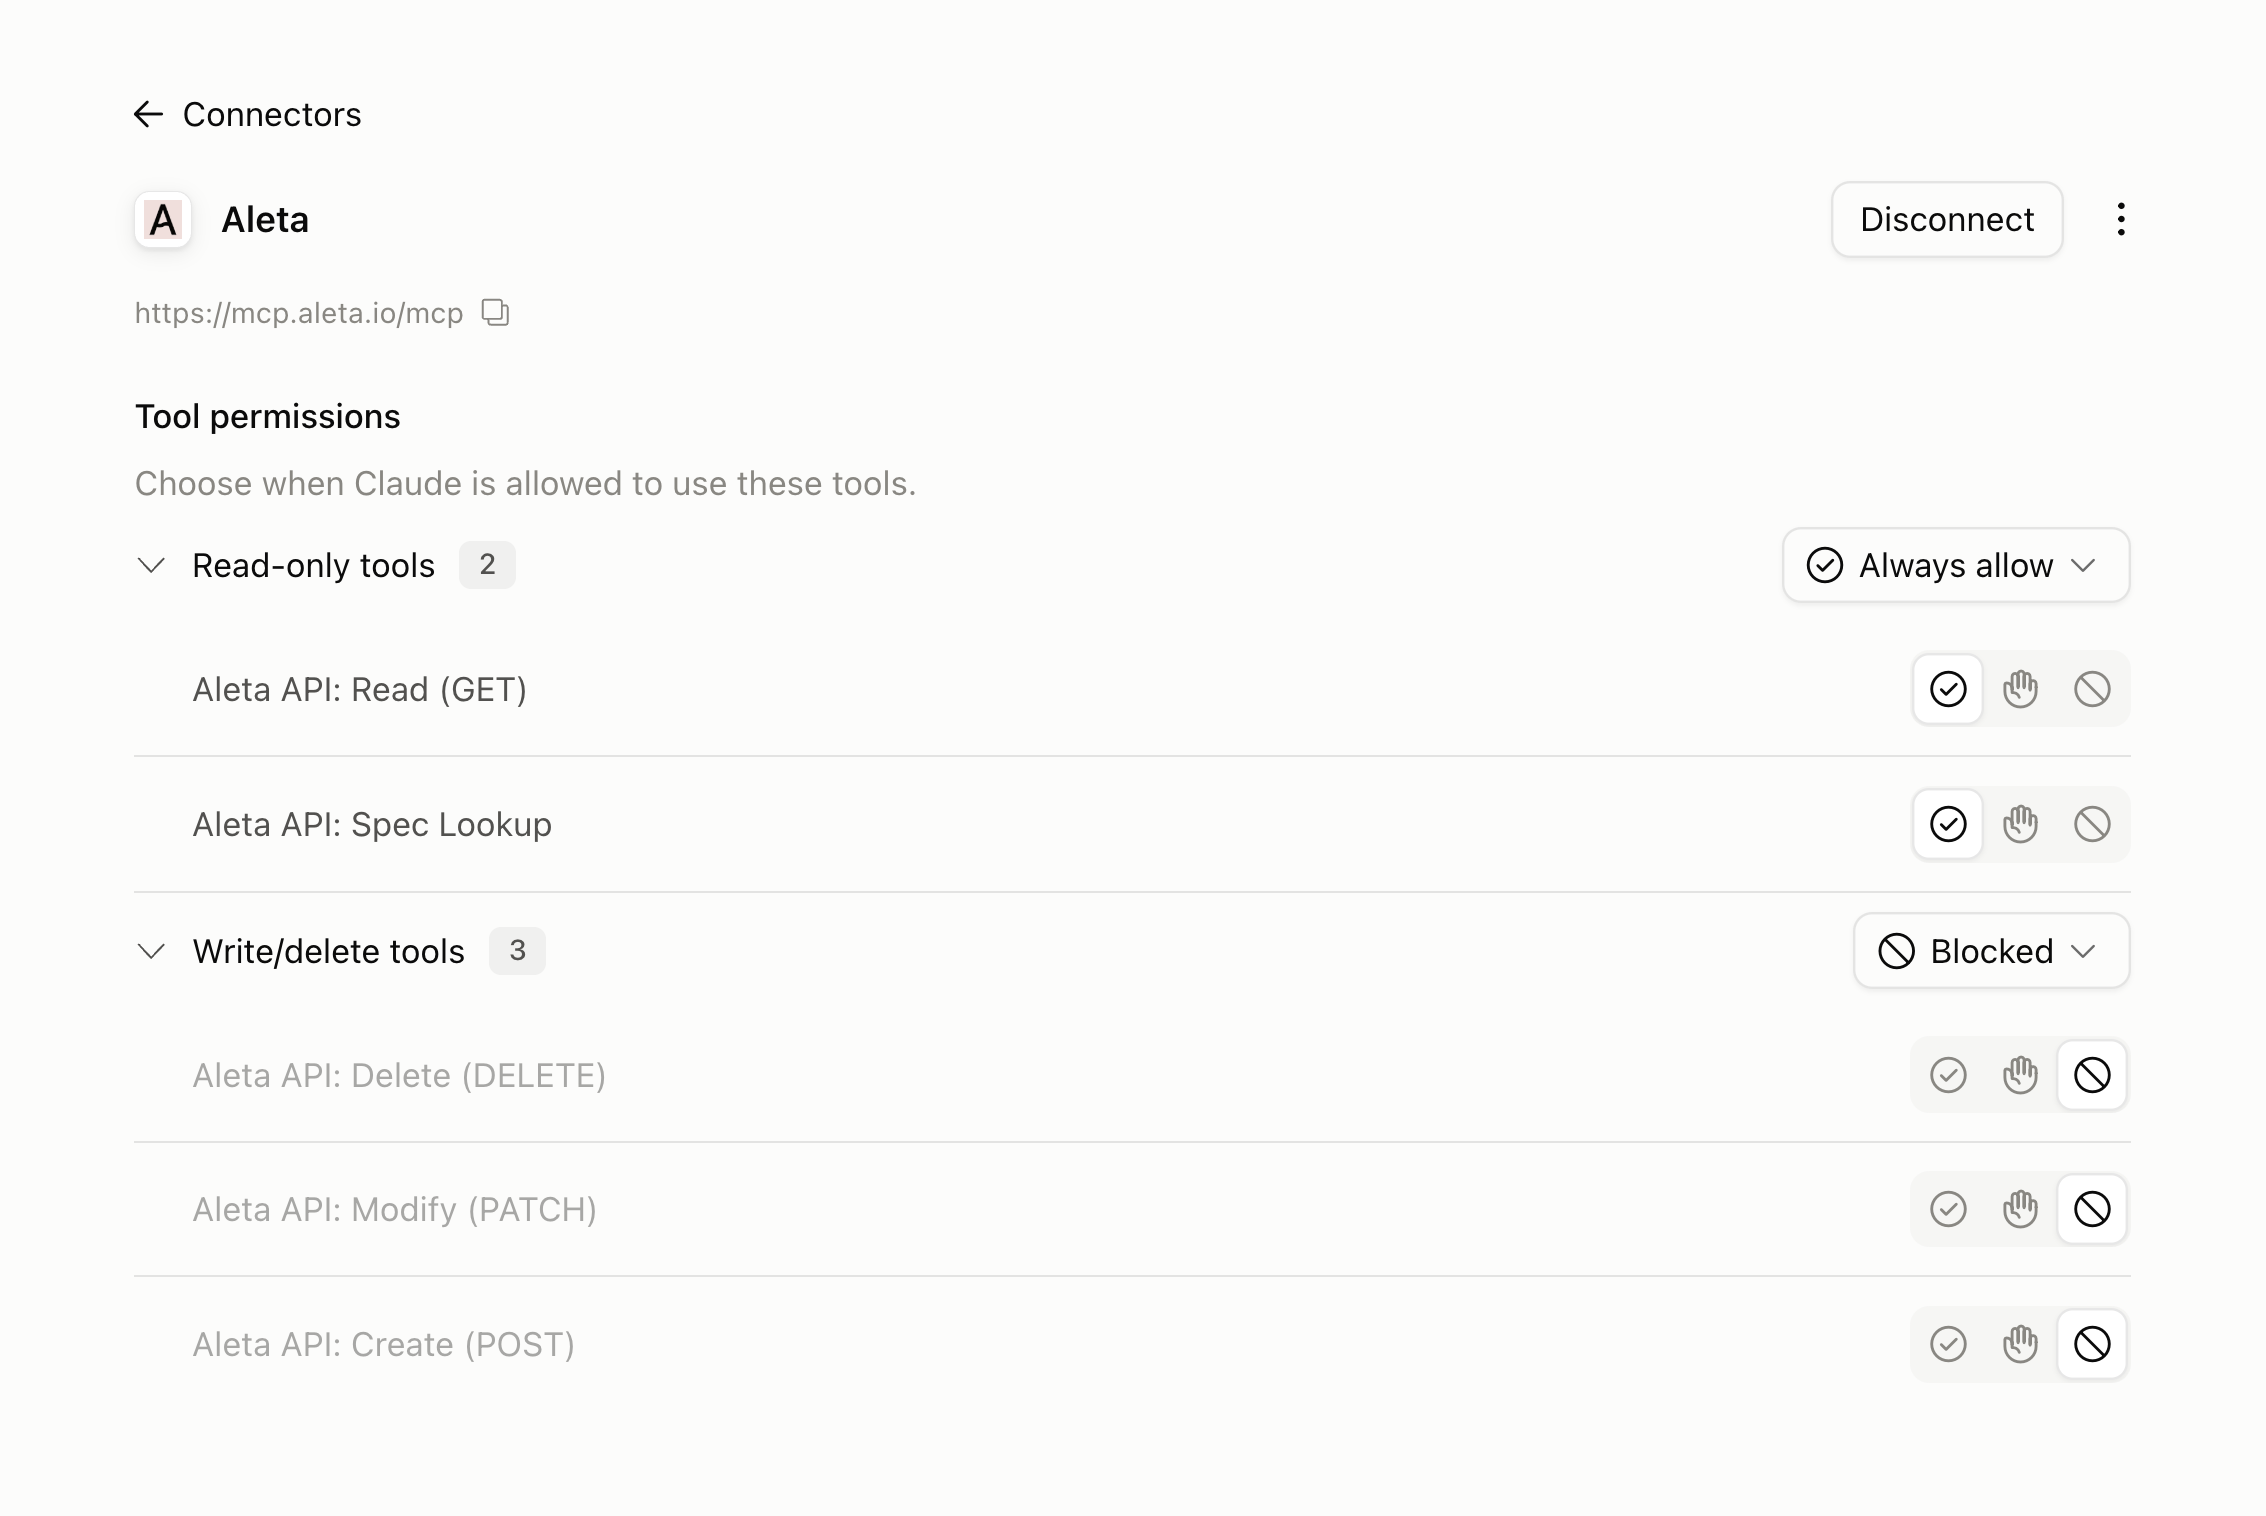
We recommend this for anyone who uses Aleta mainly to look things up, and for organisations that want to rule out accidental changes made through an agent. Approving a write tool once, in a long conversation, is easy to do without meaning to; blocking removes the risk entirely.
These settings live in your own agent app, so each person can choose their own. If you administer Claude for your organisation, you can set the limits for everyone centrally instead — see below.
Setting the limits for your whole organisation
Everything above is a personal setting, which means it can be changed back just as easily. An administrator can set the same limits centrally, once, for every member of the organisation.
In Claude, as of September 2026, this lives under Organization Settings → Connectors. Click the Aleta MCP connector to open Connector details, select the Configuration tab, and scroll to the bottom. The tools are listed in the same two groups your members see.
What you choose here is a ceiling rather than a fixed value: members can make their own setting stricter, never looser. Setting the write/delete tools to Ask leaves each one reading Users can choose: Ask or Block — the agent must get approval before it writes anything, and no one can turn that off.
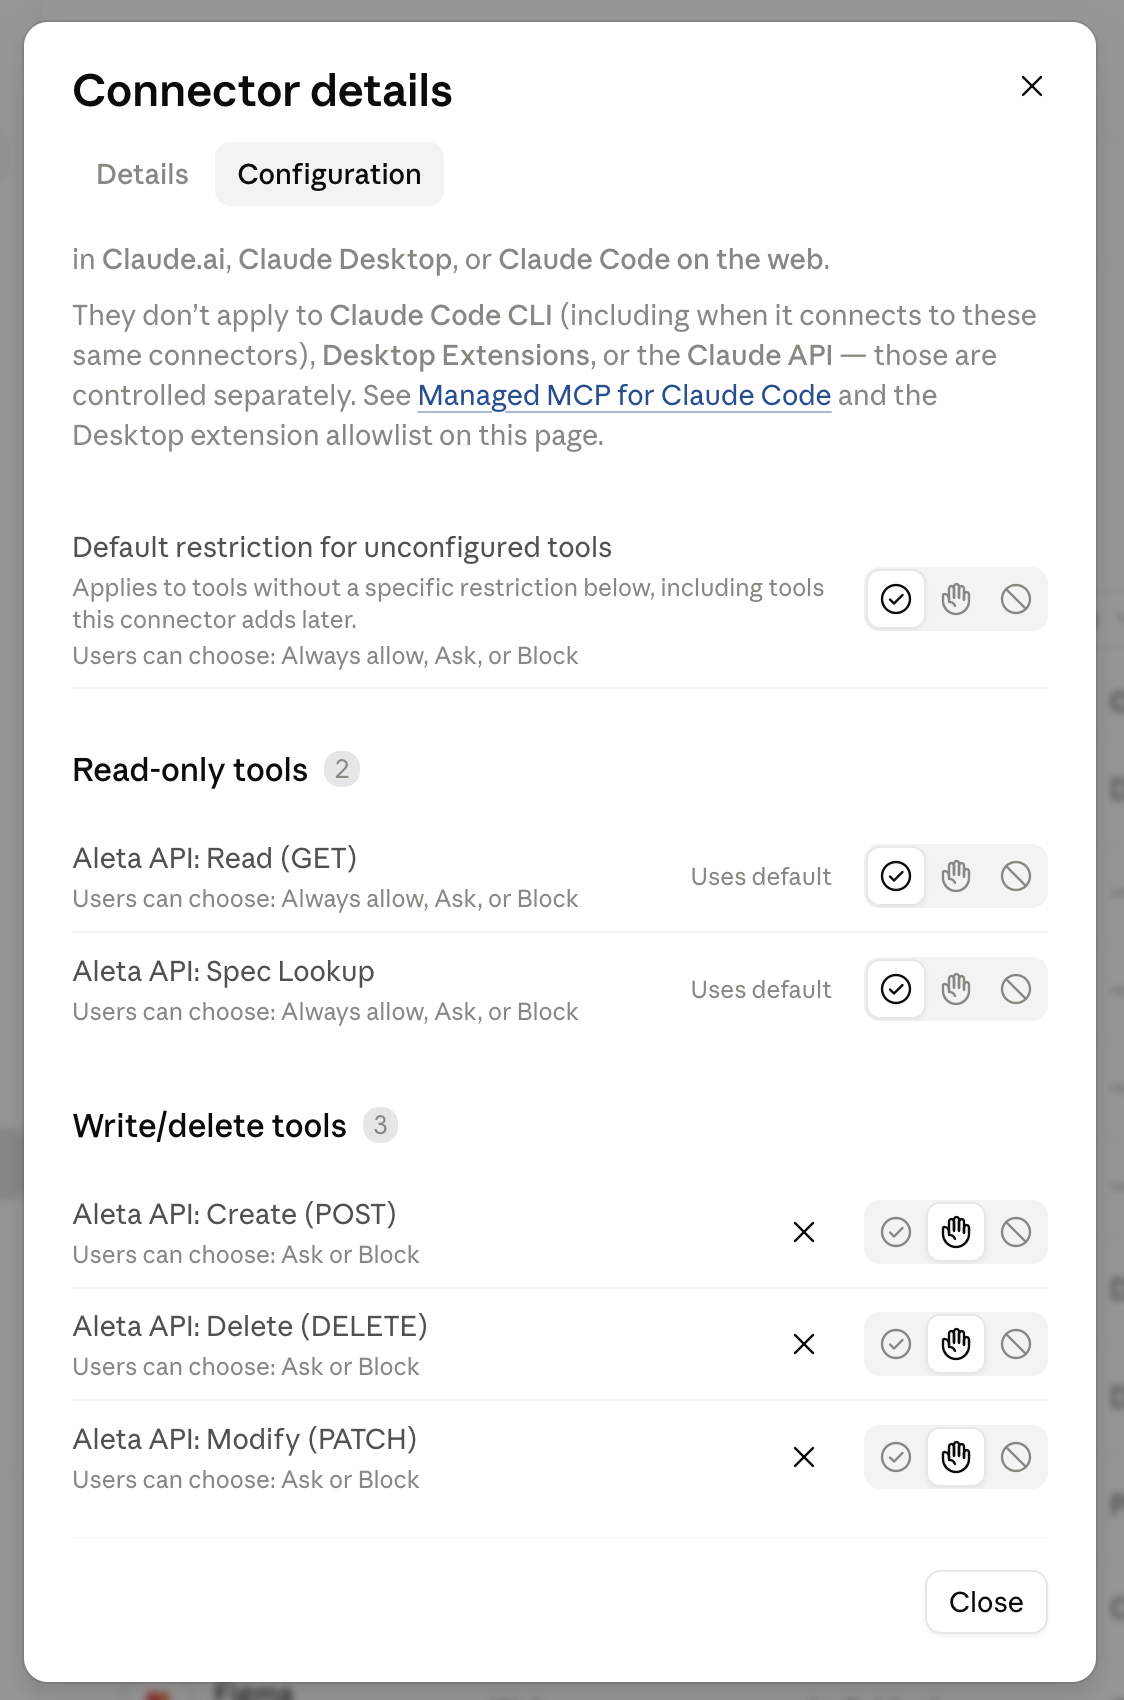
Choosing Blocked instead makes the read-only setup organisation-wide: each write/delete tool greys out and reads Tool blocked for all users. Agents across the organisation can then read Aleta data and nothing else.
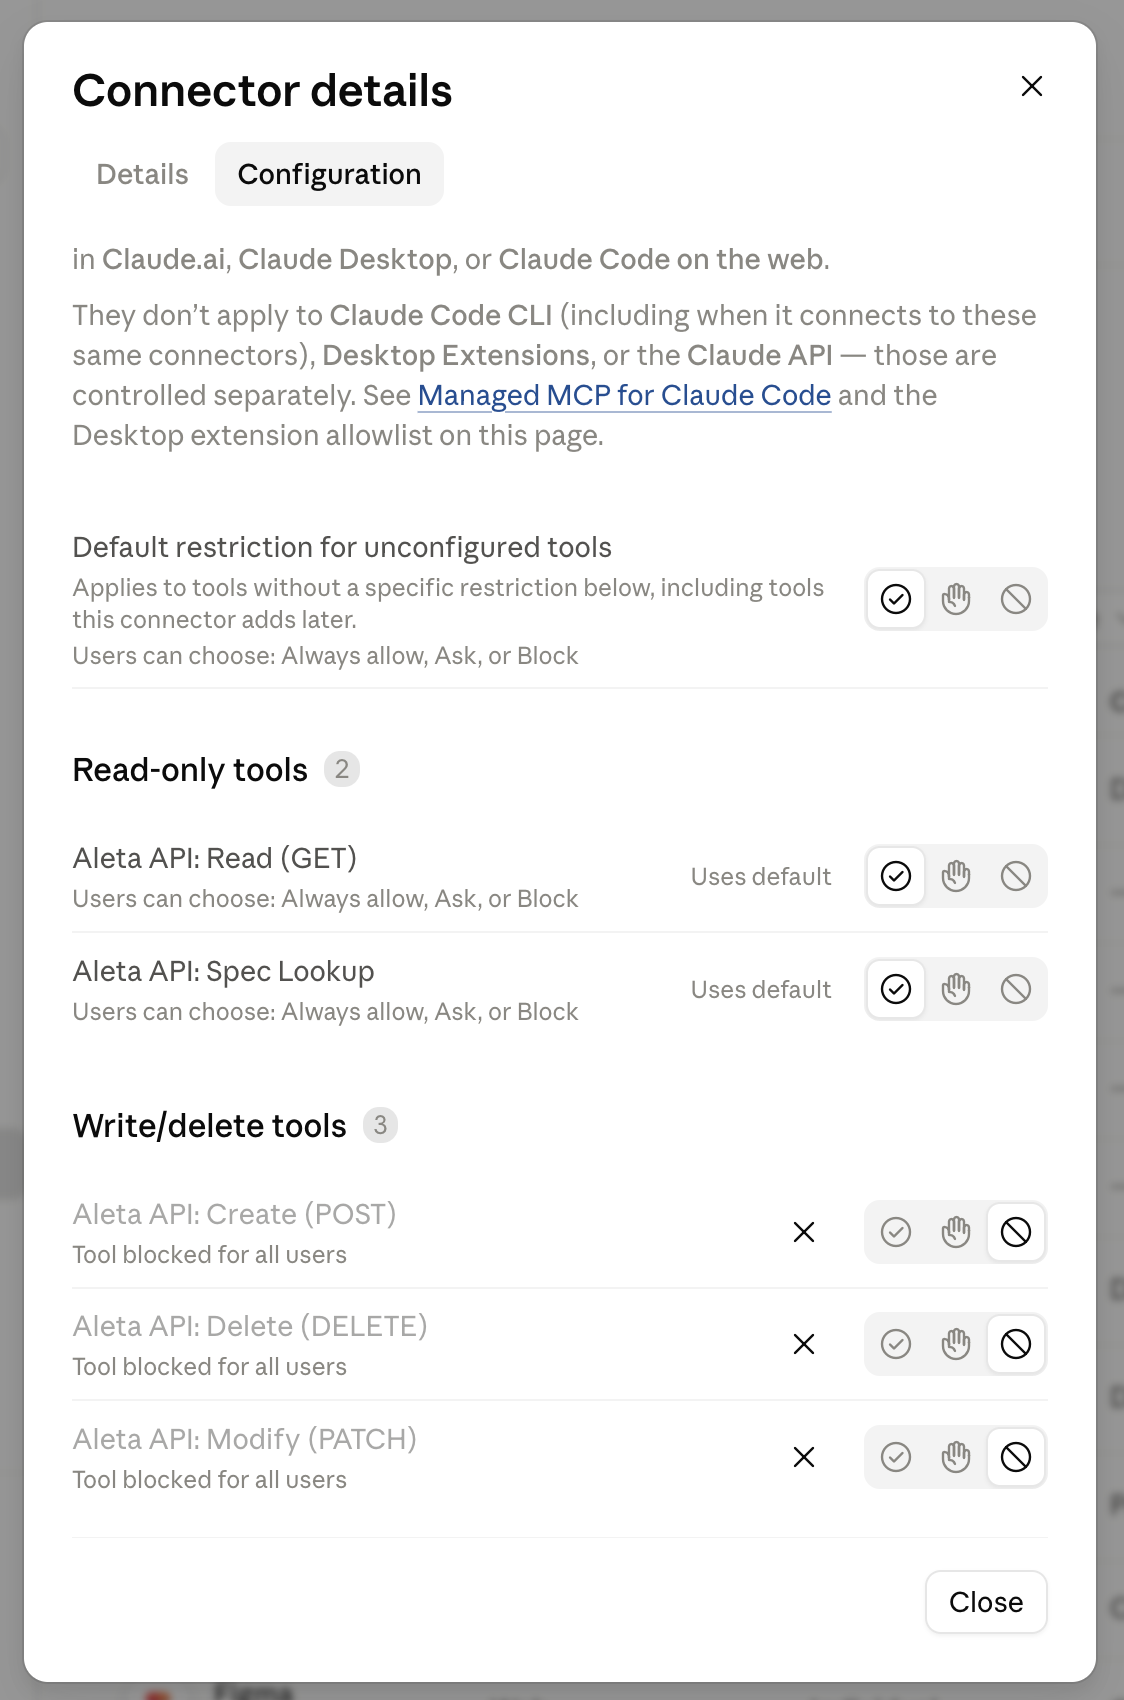
One row deserves a second look: Default restriction for unconfigured tools covers any tool without a setting of its own, including tools the connector gains later. The read-only tools sit under it — they show Uses default — so if you leave it at Always allow, a tool we add in future arrives unrestricted. Set it to Ask if you would rather approve new tools before anyone uses them.
These restrictions apply to Claude.ai, Claude Desktop and Claude Code on the web. They do not cover Claude Code CLI — even when it connects to the same connector — Desktop Extensions or the Claude API, each of which is configured elsewhere. Blocking the write tools here does not, on its own, make your organisation read-only everywhere.